Hexlox Top 13 Bike Mechanic Tips That Will Save You Money

Hexlox's top-13 list of tips that pro-bike mechanics wish you knew about before taking your bike to their shop. These tips will save you big bucks.
Summer is in full swing and you have probably done a good amount of riding already so it's now a good moment to take a quick look at your bike and make sure everything is OK.
To help you, here are Hexlox's top-13 pro-mechanic tips - that will save you money. Taking some time to maintain your bike will save you money and make your ride more enjoyable - so without further ado...

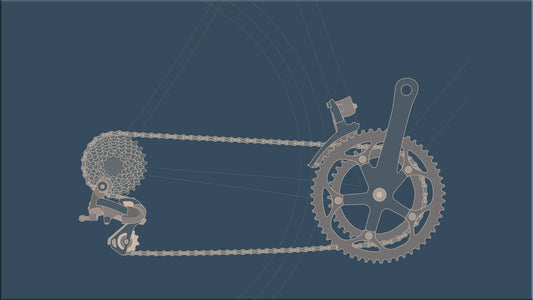
1. Clean Your Drivetrain Regularly.
A dirty chain will slow you down and cost you money. Since the oil, or lube on your chain is wet, it captures dirt and grime from the road and forms a paste that essentially acts like sandpaper, grinding away at the drive train. The solution is to use a chain scrubber to keep your chain clean.
Fill the container with a degreaser, place the container under the chain and lock the lid in place. Rotate the drivetrain backwards for 2-3 mins. to run the chain through the scrubber.
When done, dry the chain off with a rag and apply dry lube if you will be riding in dry weather. If the forecast is rain, use wet lube. It's Important to wipe off any excess lube, which will do nothing but capture more grime and dirt.
Keep a rag handy in the place where you normally park your bike to quickly wipe clean the chain after every ride. To clean the cassette simply remove the rear wheel and use a folded rag to reach in between the sprockets.
Advanced Pro Tip! If you are interested in having an immaculately clean drive train to increase your drive chain efficiency and save a few watts (and finally nab that KOM/QOM) - hot-waxing your chain is the way to go.
This is done in two steps:
#1 - Chain Cleaning . Thoroughly clean the chain from the manufacturer's oil or grease.
This is done in two steps - the first is immersing the chain in 2-3 baths of degreaser. Fill a container with a degreaser and vigorously shake the container to remove grease, dirt, and grime. Repeat his step until the chain doesn't leave any residues in the degreaser.
Now it's time for bath #2 with Isopropyl Alcohol. The Isopropyl Alcohol removes any degreasing residue and permits the hot wax to bond with the now absolutely clean and raw metal surfaces. The wax can now penetrate the microscopic cracks and completely bond with the surface. Let the chain soak in the Isopropyl Alcohol and vigorously shake the container a few times. Take the chain out and let it dry thoroughly.
#2 - Hot Wax Bath . Fill a slow cooker with chain wax and let it melt. Immerse the now clean chain in the hot wax for about 30 mins. Agitate the chain from time to time. After about 30 minutes in the wax bath, hang the chain up to dry. When the chain is dry, it will be stiff, so simply loosen the links by pulling the chain over a doorknob or old chair. Install chain back on your bike and go for a ride.
(When you notice that the wax has worn off simply repeat step #2.)
Studies suggest that hot waxing a chain can extend the chain life up to three times. Not only will you save money on chains - a chain is roughly €40,- - but the cassette - which is much more expensive - (€75,- up to 400,-) will last much longer as well. On top of all this, your drive train will look immaculate and you could gain up to 4-8 watts of power.

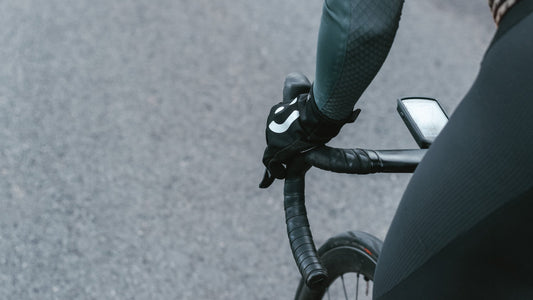
2. Ride With The Correct Tire Pressure
Riding with the correct tire pressure lets you ride faster, smoother with less effort, as well as avoiding pinch flats (if you ride with clinchers) You will save time since you will get fewer flats - and time is money, right? But the most obvious reason is comfort - you will simply enjoy your ride more.
While we're on the subject of tire pressure we wholeheartedly recommend you to switch to a tubeless setup. You will simply have fewer flats to deal with and you can ride with slightly lower tire pressure, which increases both comfort and speed - Yes, really!
Here are two useful online tire pressure calculators that will give you the optimal tire pressure for your type of riding:
https://info.silca.cc/silca-professional-pressure-calcula tor
https://axs.sram.com/guides/tire/pressure

3. You Will Get A Flat, Eventually…Learn How To Fix It
If you ride your bike, you will get a flat. period. Be prepared for this by learning how to fix a flat on the road. Being prepared with the right tools and knowing how to use them means you can be up and riding again in 5-10 mins - compared to having to lock up your bike and call a taxi, take public transport, or push the bike home. Your time is worth money, right?
Being prepared for any eventualities means always riding with these 4 items in your saddle bag or pocket:
Spare Tube - Save time by not fixing a flat on the road. Instead, replace the punctured inner tube with your spare tube and fix the puncture when you get home.
Tire Levers - To remove the tire from the rim, and access your inner tube, you need 2-3 tire levers.
Compact Pump - On the road, you need to be able to top up your air pressure or completely inflate a tire with a compact pump. Using a smaller size pump means it will take longer, and you have to work harder to inflate than with a regular floor/track pump. We have found that the Lezyne Pocket Drive Pump strikes the perfect balance between portability and performance
Multi-Tool - Saddle too high, or too low? Adjust it instantly with your multi-tool. Creaking from the pedals? Tighten them with your multi-tool. You get the picture, right?

4. Replace Your Chain When Worn Out - Give Your Cassette Longer Life - Save Big Bucks
Even if you take good care of your drive train and clean your chain regularly, it will eventually wear out. period. Riding with a worn-out chain means that you expose your expensive cassette to unnecessary wear. Replace the chain when worn out and extend the lifespan of your cassette. Use a Chain Wear Indicator tool to see when it's time to replace your chain.
5. If Your Bike Makes A Noise, It's Trying To Tell You Something.
A well-adjusted bike should run virtually without any creeks, squeaks, or rattling noises. Not only is it annoying to ride around with these noises, but you might also get pitiful and even scornful looks from other riders…Acceptable noises are a gentle whirring from your drive train and lighter clicks and clacks when switching gears. Other noises mean that your bike is trying to tell you that something is not quite right. Stop and investigate. Catching a problem early can potentially save you big bucks.

6. Use a torque wrench
Over tightening parts and fasteners, stripping bolts, or cracking parts is not only expensive but could also prove very time-consuming. Watch out for this, especially if you have a carbon frame or carbon parts (that are more susceptible to over-tightening.) You can avoid this by using a torque wrench when working on your bike. A torque wrench allows you to set the torque applied to the fastener to match the manufacturer's specifications for that particular bike part.

7. Respect Your Local Bike Mechanic - Don't Try To Be A Hero
Don't try to be a hero and fix problems that are beyond your expertise or skillset. Things like replacing the bearings in the bottom bracket or hubs are best left to the experts. Support your LBS (Local Bike Shop) and cultivate a respectful relationship with the mechanics there. Things can go wrong and you could accidentally break a part, but don't lie to your mechanic to save yourself the embarrassment. Better tell the truth!

8. Use Quality Tools - The 7 Tools You'll Need
Multi-Tool - For smaller emergency repairs on the road
Hex Wrench Set - This is the go-to toolset that you'll keep in the garage or at home. Most work on your bike will be done using these tools.
Floor Pump - Quickly and easily inflate to the correct tire pressure before you head out.
Torque Wrench - Don't overtighten (and break) expensive bike parts.
Chain Scrubber Tool - Keep your chain clean. Ride faster & save money
Chain Wear Indicator - Replace your worn chain at exactly the right moment. Not too late, not too early.
Compact Pump - For quick emergencies on the road.
9. If It Has A Thread - Grease It.
Any fastener or part with a thread should be greased to avoid seizing and getting permanently stuck. Nothing is more frustrating than trying to remove a stubbornly stuck bolt. Not only is it harder to remove an ungrease bolt, potentially you could end up rounding the bolt head, and all of a sudden it's double-stuck. Sized and rounded. If something gets stuck permanently you have to drill or cut it out. Expensive.
10. Check For Play In The Bearings
Periodically check for bearing play in your headset, hubs, and cranks. To check your headset, squeeze the front brake and rock your bike back and forth. For wheel and crank bearings, pull the wheel or crank side to side. If you feel a wiggle, your component needs an adjustment. Don't ignore it, or the problem will get bigger and more expensive.
11. Set Up An Easy Charging Station Next To Your Bike
It's easier to always have your electronic bike gear (computer, lights, power meter) charged and ready-to-go if you set up a charging station next to where you normally keep your bike. After each ride, hook up and charge everything, so you never run out of juice on the next Century ride.

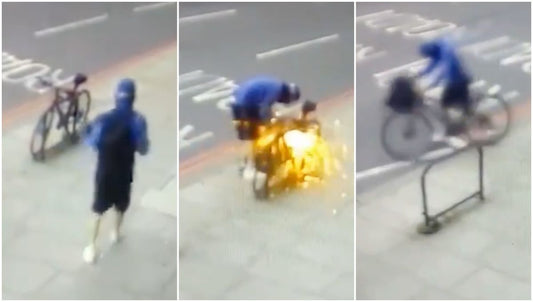
12. Always Ride With Lights - Even In The Summer
This is not a maintenance tip but rather a safety tip. Always, repeat always, ride with lights on - even during daytime and in the summer. Using a simple clip-on light will increase your visibility tenfold. At Hexlox we offer the Eclipse - a super simple yet very stylish clip-on light from Bookman - that boasts a super useful dual-color mode - white and red light!
No batteries - charge via USB!

13. Don't Loan your Bike Tools To Your Friends
... you will never see them again. Trust us on this one.